Spare printer swap
This is the process for swapping a broken kitchen printer with a spare kitchen printer.
- Unplug the broken kitchen printer from power and network.
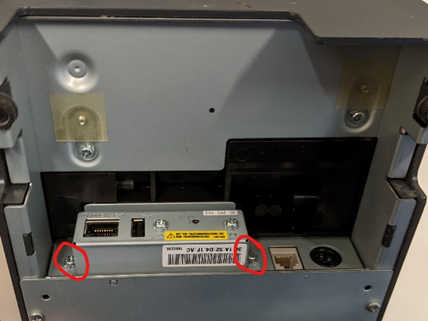
- Unscrew the two screws holding the network card. See below.
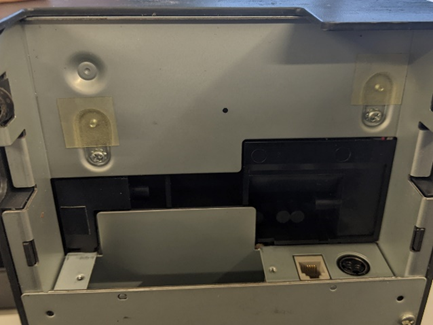
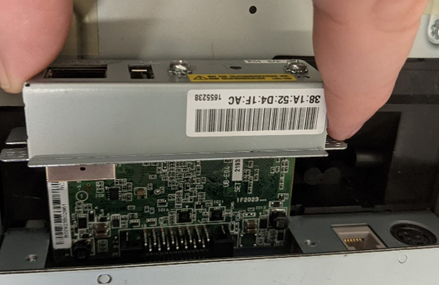
- Remove the network card from the slot. It should look like the below.
- Set aside the network card and two screws.
- Check if your spare printer has a card in the network card slot. If there is a card in that slot repeat steps 1-3 with the spare printer.
- Insert the card from the broken printer into the spare printer. This transfers the configuration from one printer to the other.
- Screw the network card in place with two screws.
- Plug power and data into the printer.
- Turn on the printer with the rocker switch on the front. "|" is on, "O" is off.
- Send some test tickets to the printer to ensure they are printing properly.
- Label the broken printer as broken and report the issue and serial number to FB Support. If you have a loose network card from the swap go ahead and install it with the screws into the broken printer.
Troubleshooting
-
When you turned on the printer the error light is flashing red.
Your spare printer is configured for Aloha.- Unplug the printer from power and data.
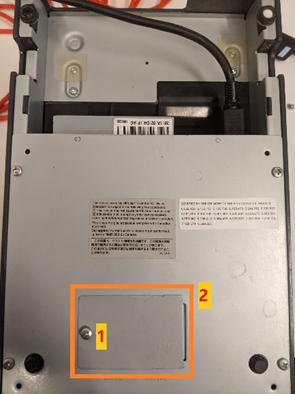
- Flip over the printer and unscrew the screw (1) and remove the plate (2).
- You will see two banks of small switches (3 & 4). These switches are numbered left to right one through eight.
- Using a small tool flip the switches up or down to match the pattern shown.
Top Left (3): All down except 8.
Bottom Right (4): 2 and 4 up. The rest are down.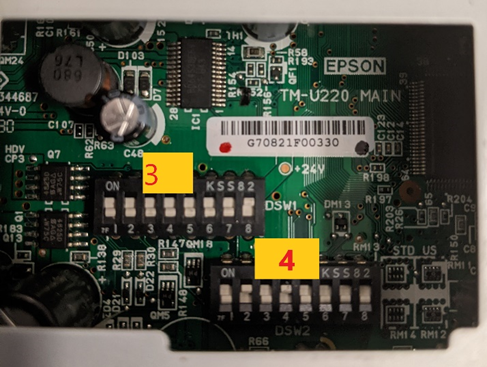
- Replace the plate and screw, plug in and turn on the printer.
-
Printer isn’t printing tickets or is printing the wrong tickets.
The printer probably has the wrong IP address.- Turn on the printer with the rocker switch on the front. "|" is on, "O" is off.
- With the printer already turned on, press in and hold the "SW Reset" button next to the network port on the back with a pen or paper clip. After a few seconds the printer will start to print a settings report.


- On that settings report there is a section with IP Address. Send FB support the IP address and the position of the kitchen printer in the line (Grill, Fry, Salad, Sandwich, Etc.). With those two pieces of information FB support can configure the IP address.
- Once FB support have configured the printer you will need to turn off the printer, turn it back on, wait 60 seconds and test the printer by firing an item that would print to that position.